Setting Up Your Clarity Video Anywhere is as Easy as 1, 2, 3
*NOTE: CVA is accessible directly through a URL or your Clarity Portal. If you have a scheduled meeting on your calendar, you will have a URL in your meeting invite.
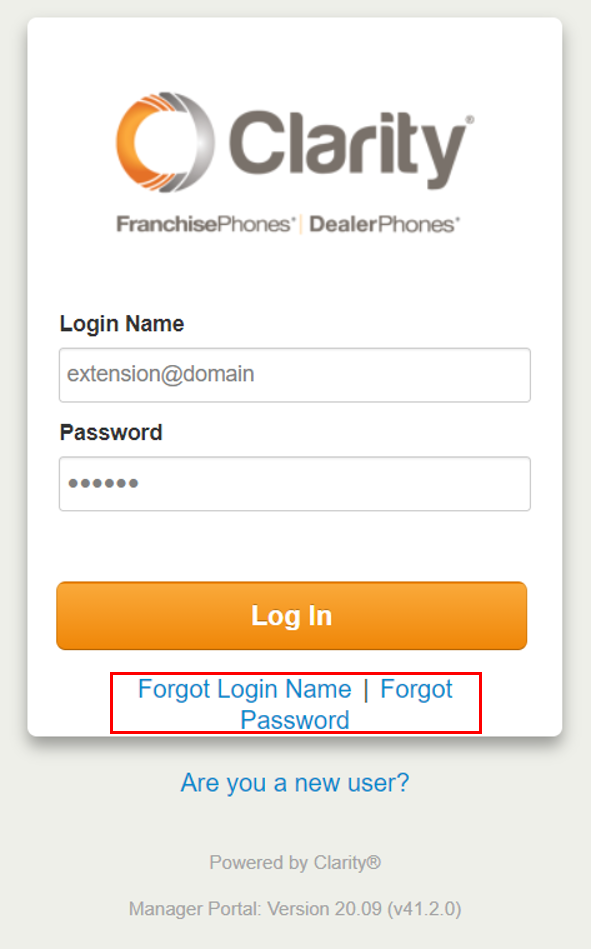
1. Navigate to portal.clarityvoice.com, you should see the login page:

2. Enter your Extension and Domain, for example, 200@handyman, along with your password. If you don’t know your password, click Forgot Password to have a password reset email sent to you. Click Login.
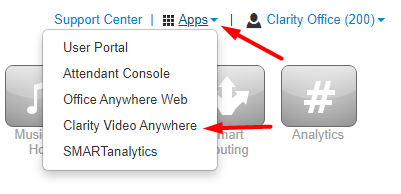
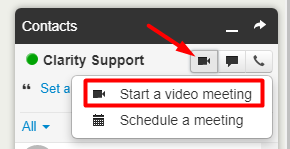
3. At the top of the page, click the drop-down arrow next to Apps or from your Contacts pop-out, click the video icon at the top. Select Clarity Video Anywhere and a new window will launch:

After logging in, you are taken to the video meeting hub where you will see all your scheduled meetings, as well as the option to:
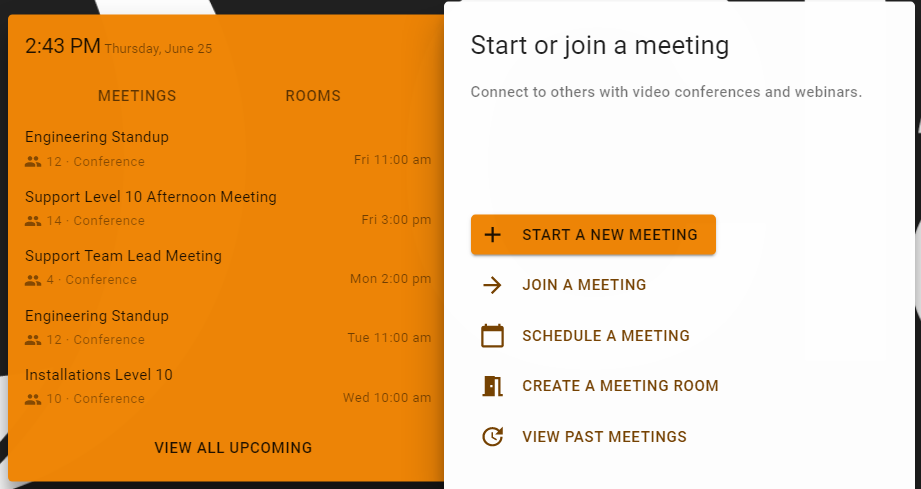
- Start a new meeting
- Join a meeting
- Schedule a meeting
- Create a meeting room
- View past meetings
Start a New Meeting
Use this option to start an impromptu meeting
- Click Start a New Meeting
- Enter a Meeting Name and Description (optional)
- Add internal people by typing their name or extension or enter an email address for an external party
- Click Save
Join a Meeting
There are three ways to join a video conference meeting, internally, as a guest or as an impromptu internal meeting.
Join an internal video conference meeting 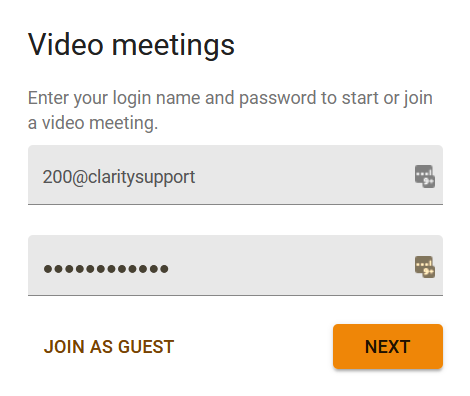
- Click the meeting ID URL in your email or on your calendar
- Login with your Portal login name and password
- Click Next
Join a video conference as a guest
- Click the meeting ID URL in your email or on your calendar
- Click Join as Guest at the bottom of the video meeting login
- Enter your name and email address
- The Meeting ID will be pre-populated
- Click Next

Join an impromptu internal video conference meeting someone else is hosting 
- Click Join a Meeting
- Enter the 9-digit meeting ID
- Click Next
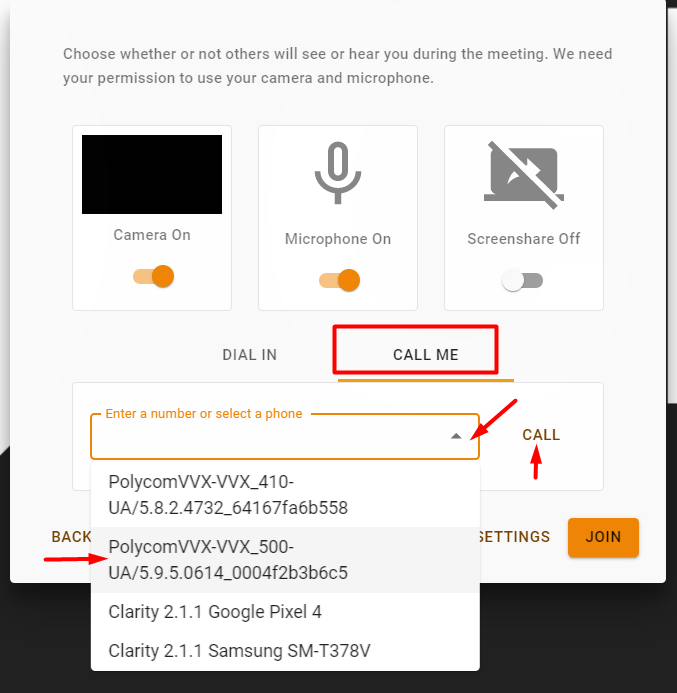
Audio and Video options for the meeting
- Choose if you want your camera, microphone and screen on or off when you join the meeting
- To use your computer microphone and speakers for the video conference call, simply click the “Join” button at the bottom right
- To join the conference using your phone for audio, click the words “Call Me” and you’ll see a dropdown box with all of your devices listed
- Select a device to use and click the word “Call“
- Your phone will ring. answer the call and you will be joined on the audio bridge
- Click the orange “Join” button at the bottom right to enter the video conference call
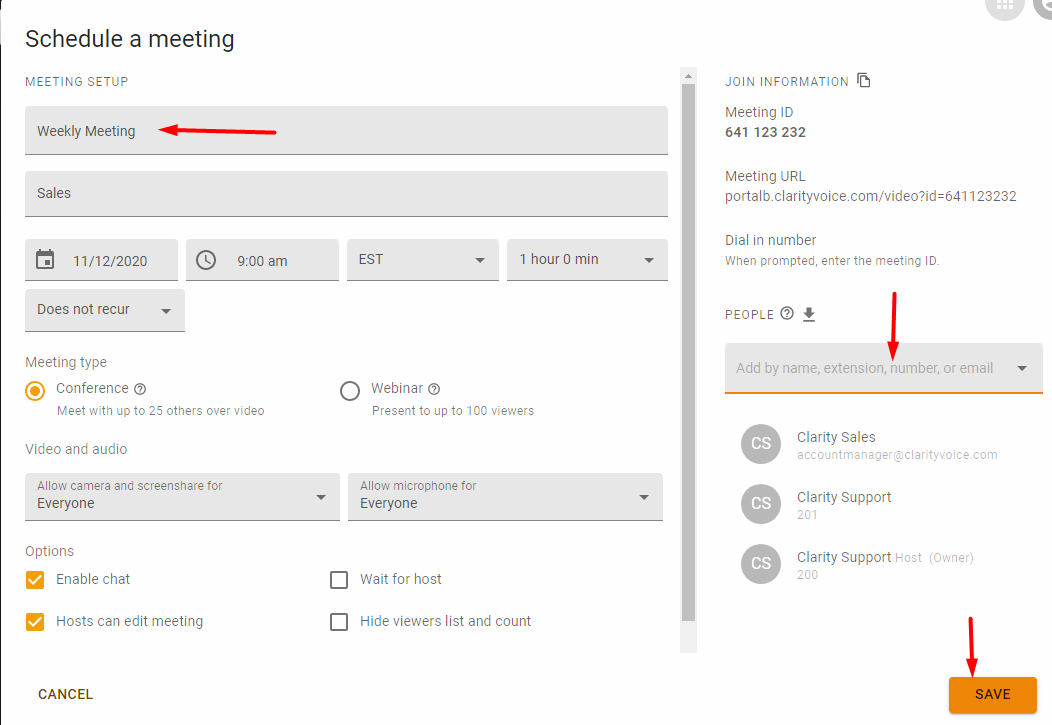
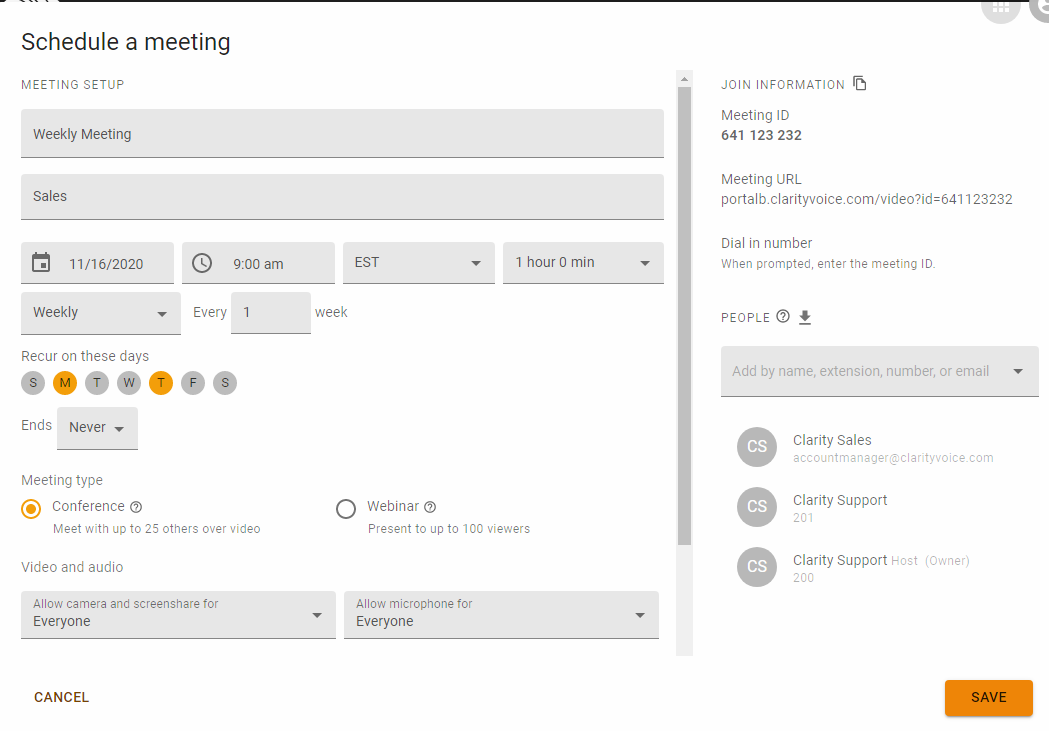
Schedule a Meeting
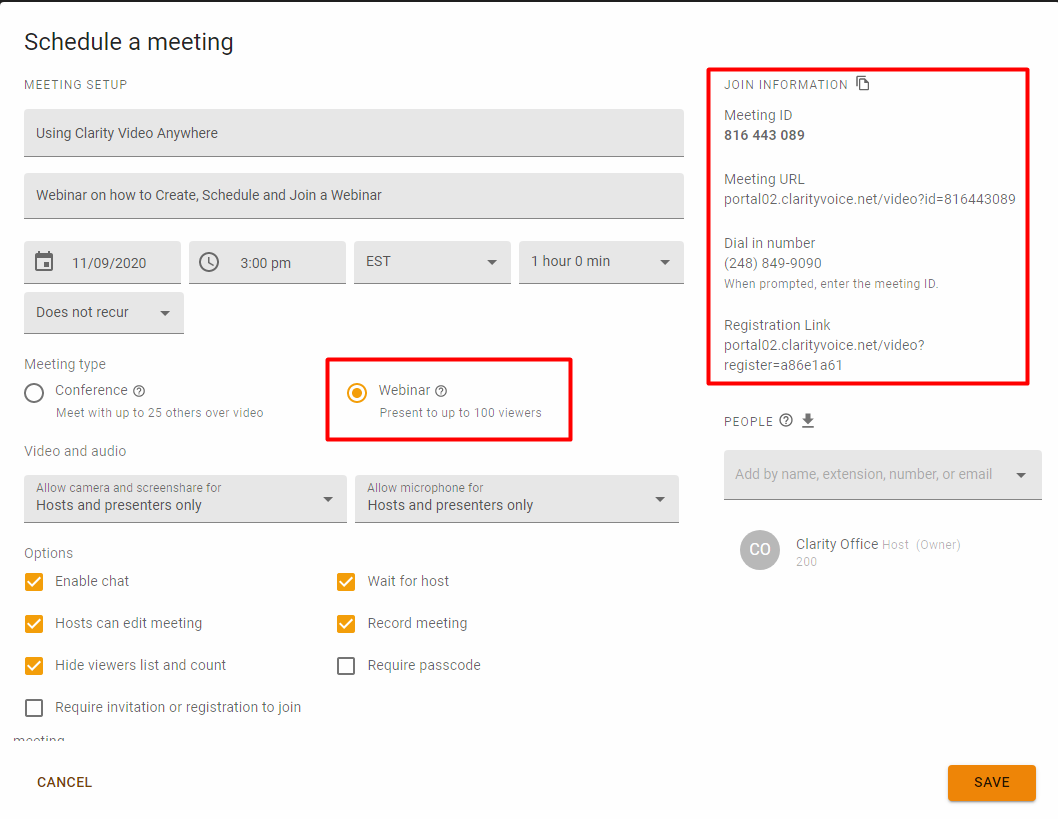
Click Schedule a Meeting to schedule a one-time or recurring meeting.
- Name the meeting and add a description (optional)
- Select the date, time, time zone, and meeting duration
- For a recurring meeting, multiple times during the week, select Weekly, then select which days the meeting recurs
- Select the meeting type: Conference or Webinar
- Select the options you want the meeting to have enabled
- Add people to the meeting by entering their name, extension or email address
- Click Save

- An email invitation will be sent to participants
- Double-click the invite.ics file to open the invitation
- Click Yes to add the meeting to your calendar
- Accept, Tentative or Decline the meeting

Meeting Header Options
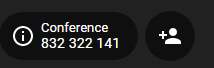
Once you’re in the video meeting, the video meeting ID will be located at the top left. 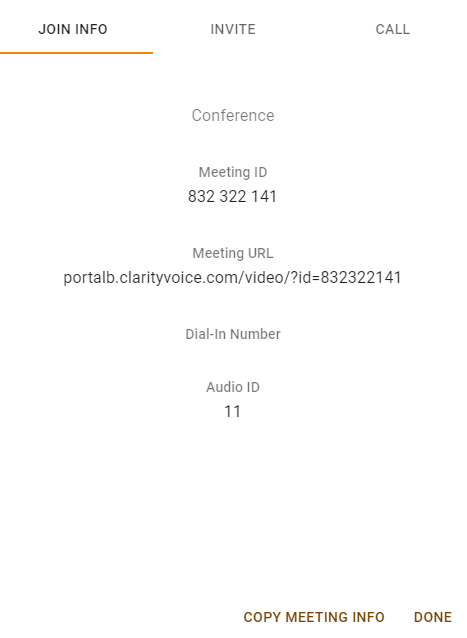 Click the info icon for the Join Info, to invite more participants or to call someone to have them join the meeting.
The meeting controls are located at the top center of the screen:

- Disable microphone
- Disable camera
- End Meeting (host will get additional options)
- Share screen
- Layout selection
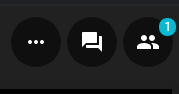
The meeting settings are located at the top right of the screen: 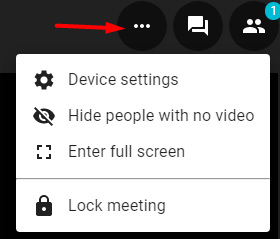
- Meeting settings
- Chat (this will open a side panel)
- Show participants (this will open a side panel)
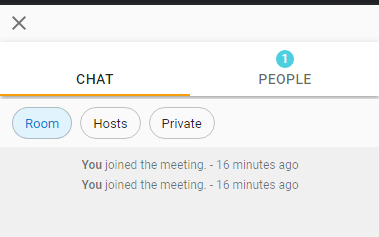
- Group chat within the meeting
- Private chat within the meeting
Webinar Registration
A webinar can be created for up to 100 participants. Click Schedule a Meeting or Start a New Meeting:
- Enter the webinar name and description
- Enter the date, time and time zone of the webinar
- Select Webinar
- Copy the Registration Link
- Click Save
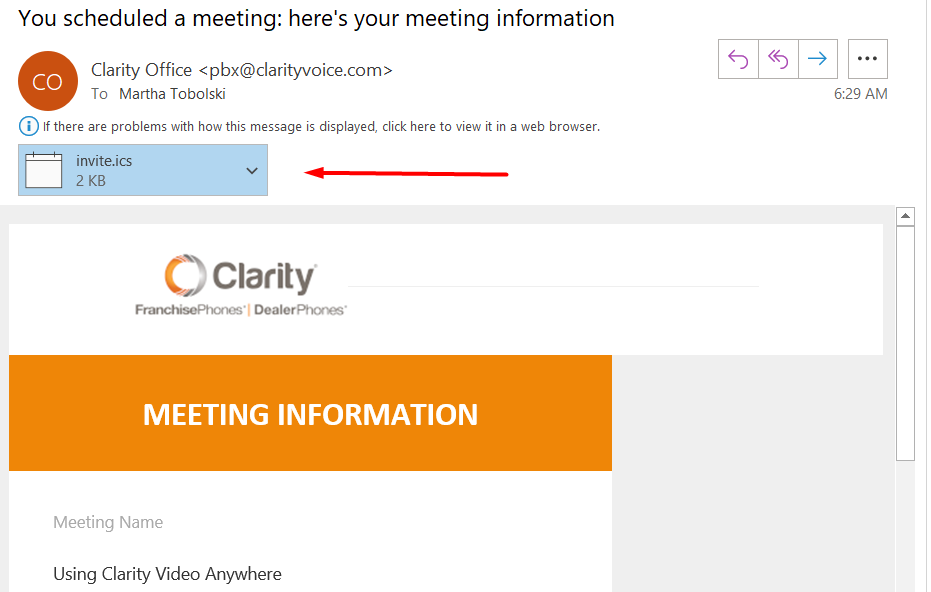
- A meeting invite will be sent to the host
- Double-click the invite.ics file to open the meeting invitation
- Accept the meeting
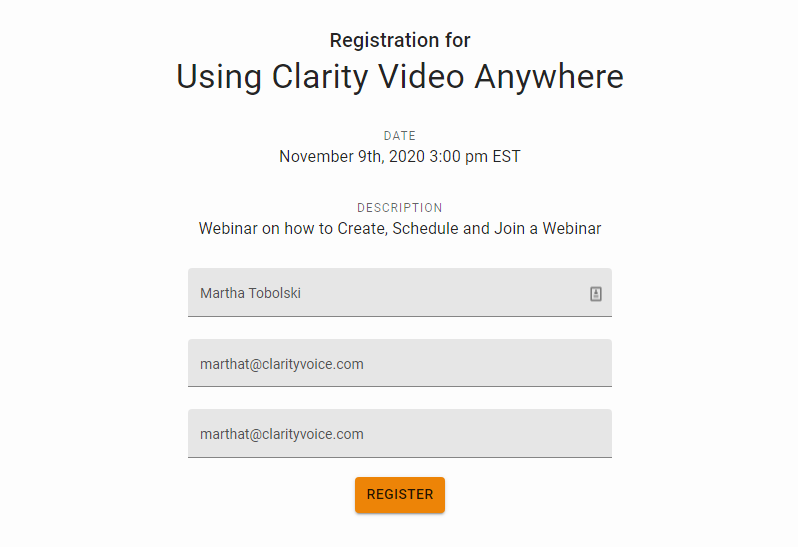
Webinar Registration Link
Email the webinar registration link to participants. The link will produce a registration screen:
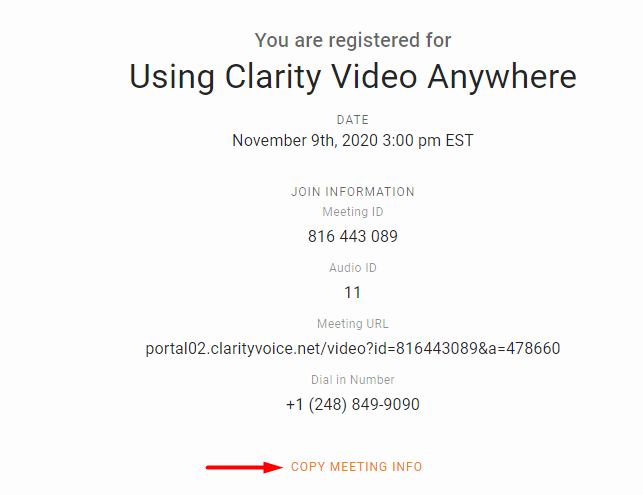
Once the participant is registered, they will receive an email with an invite.ics file to add the webinar to their calendar, as well as a confirmation similar to this screen:
Accept the Webinar Invitation
Double-click the invite.ics file and click Yes to add the webinar to your calendar: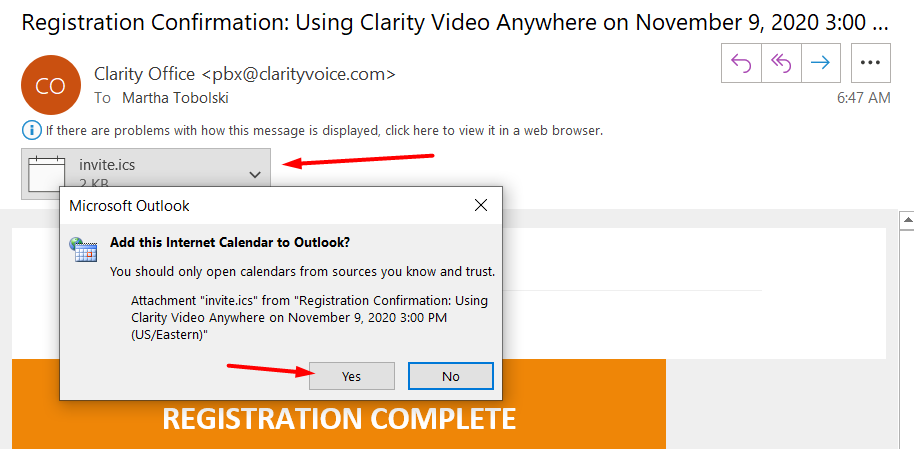
Create a Meeting Room 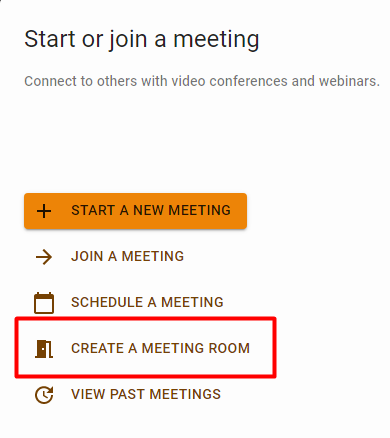
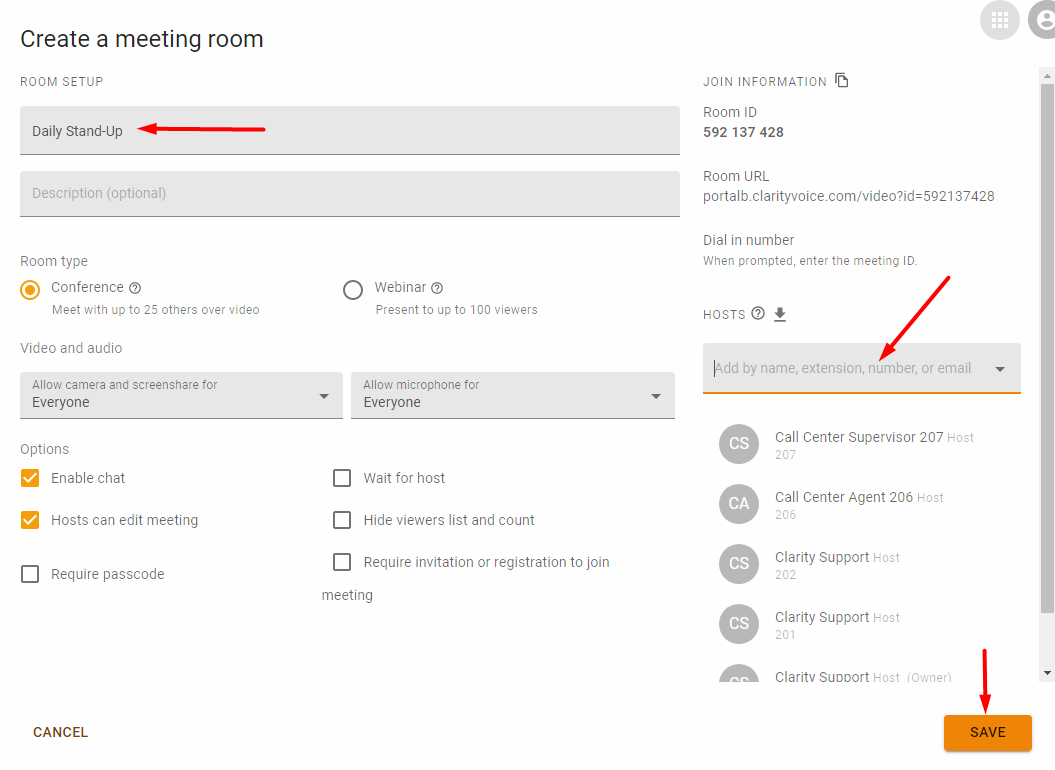
Meeting rooms are conference bridges that are always there and running allowing users to come and go as they please without having to always create a meeting. To create a Meeting Room:
- Click Create a Meeting Room
- Enter a meeting Room name and description
- Select Conference Room or Webinar
- Select the options you want to be enabled in the meeting room
- Add people to the hosts field that you would like to help administer the room
- Click Save
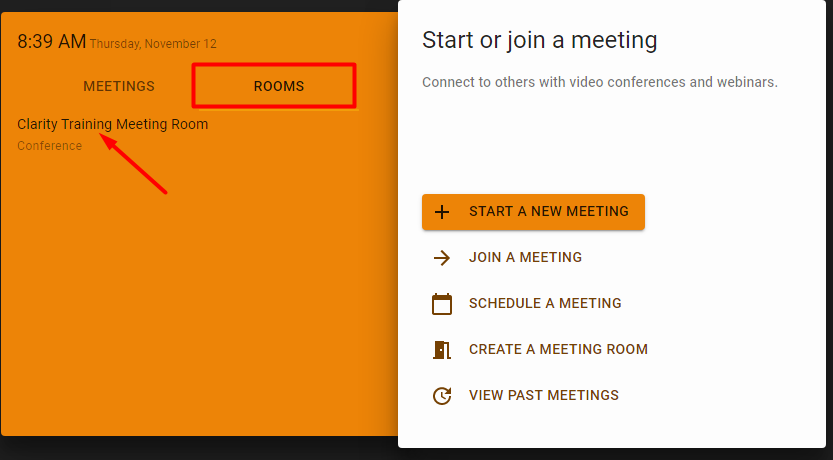
To enter a conference room that is already created, launch Clarity Video Anywhere, then click the Rooms tab. Select the meeting room you wish to enter:
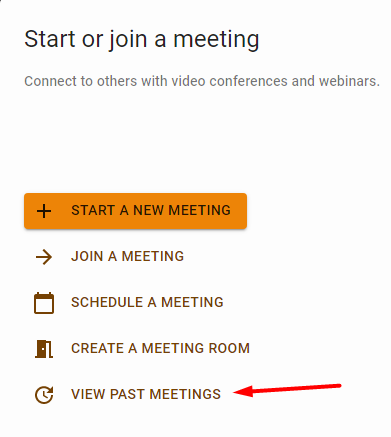
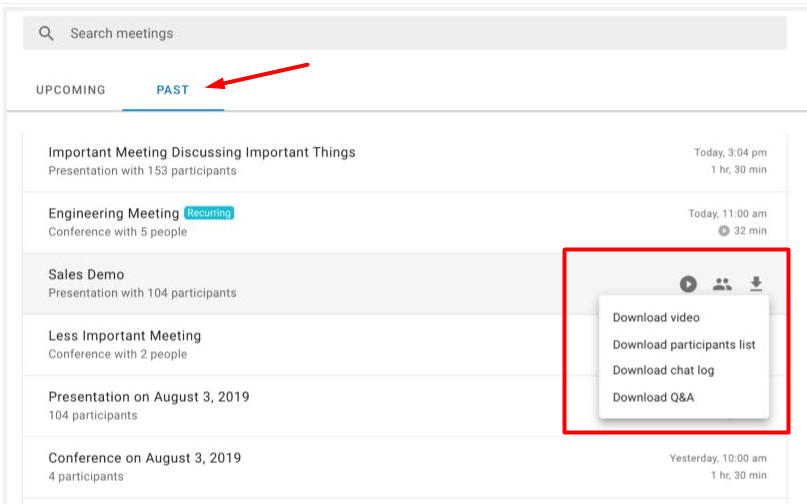
View Past Meetings
All past meetings are viewable by clicking the View Past meetings button. The video recording, participant list, chat log, and Q & A can all be downloaded: