
Setting Up Your Voicemail Transcription is as Easy as 1, 2, 3
1. Navigate to portal.clarityvoice.com, you should see the login page:
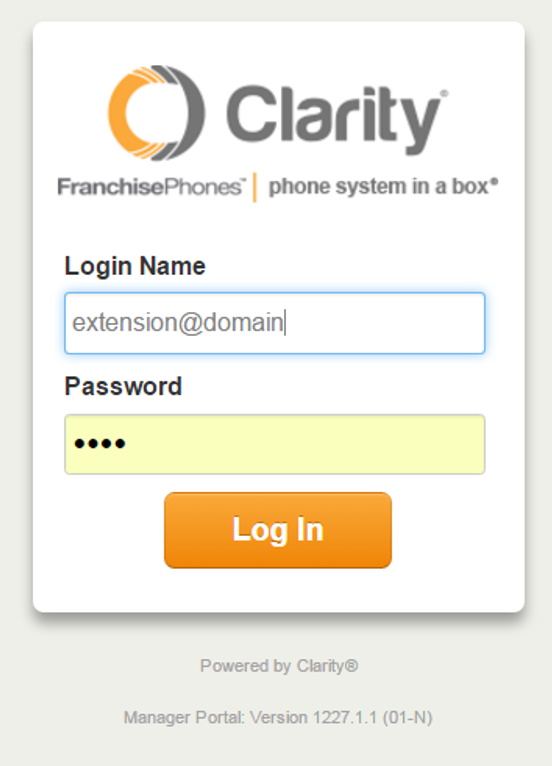
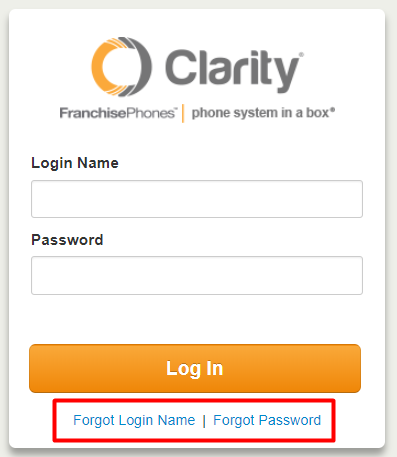
2. Enter your Extension and Domain, for example, 200@handyman, along with your password. If you don’t know your password, click Forgot Password to have a password reset email sent to you. Click Login.
3. The main landing page has several tabs, click your extension name, then choose My Account in the top right corner. *NOTE: This step is for Office Manger permissions. If you do not have Office Manger permissions, skip to step 4.
![]()
4. In the top right corner, click on the extension name again and choose Profile.
![]()
5. Enter the email address to receive the voicemail transcription in the email address field. You can add up to four more email addresses to receive the voicemail transcription by clicking the ![]() button. Click Save.
button. Click Save.
![]()
6. If you’re not already in the Messages tab, click the Messages tab.
![]()
7. Choose the Settings tab.
![]()
8. Scroll down to the bottom of the page in the Unified Messaging section. Be sure Email Notification is enabled with one of the following (these are the most popular options):
- Send w/ attachment (leave as new) – leaves the voicemail on the phone, which will have a message waiting indicator.
- Send w/ attachment (move to saved) – moves the message to a saved folder, the phone will not have a message waiting indicator. There is a 25MB limit to Saved Voicemail.
- Send w/ attachment (moved to trash) – moves the message to the trash, which is permanently deleted after 24 hours. The phone will not have a message waiting indicator.
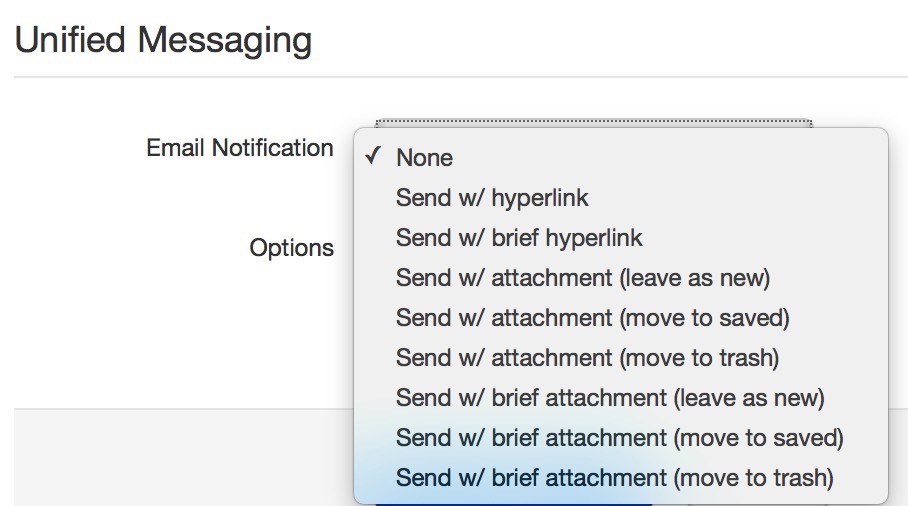
9. Click on Voicemail Transcription and choose Enabled. Click Save.
![]()